woensdag 8 januari 2014

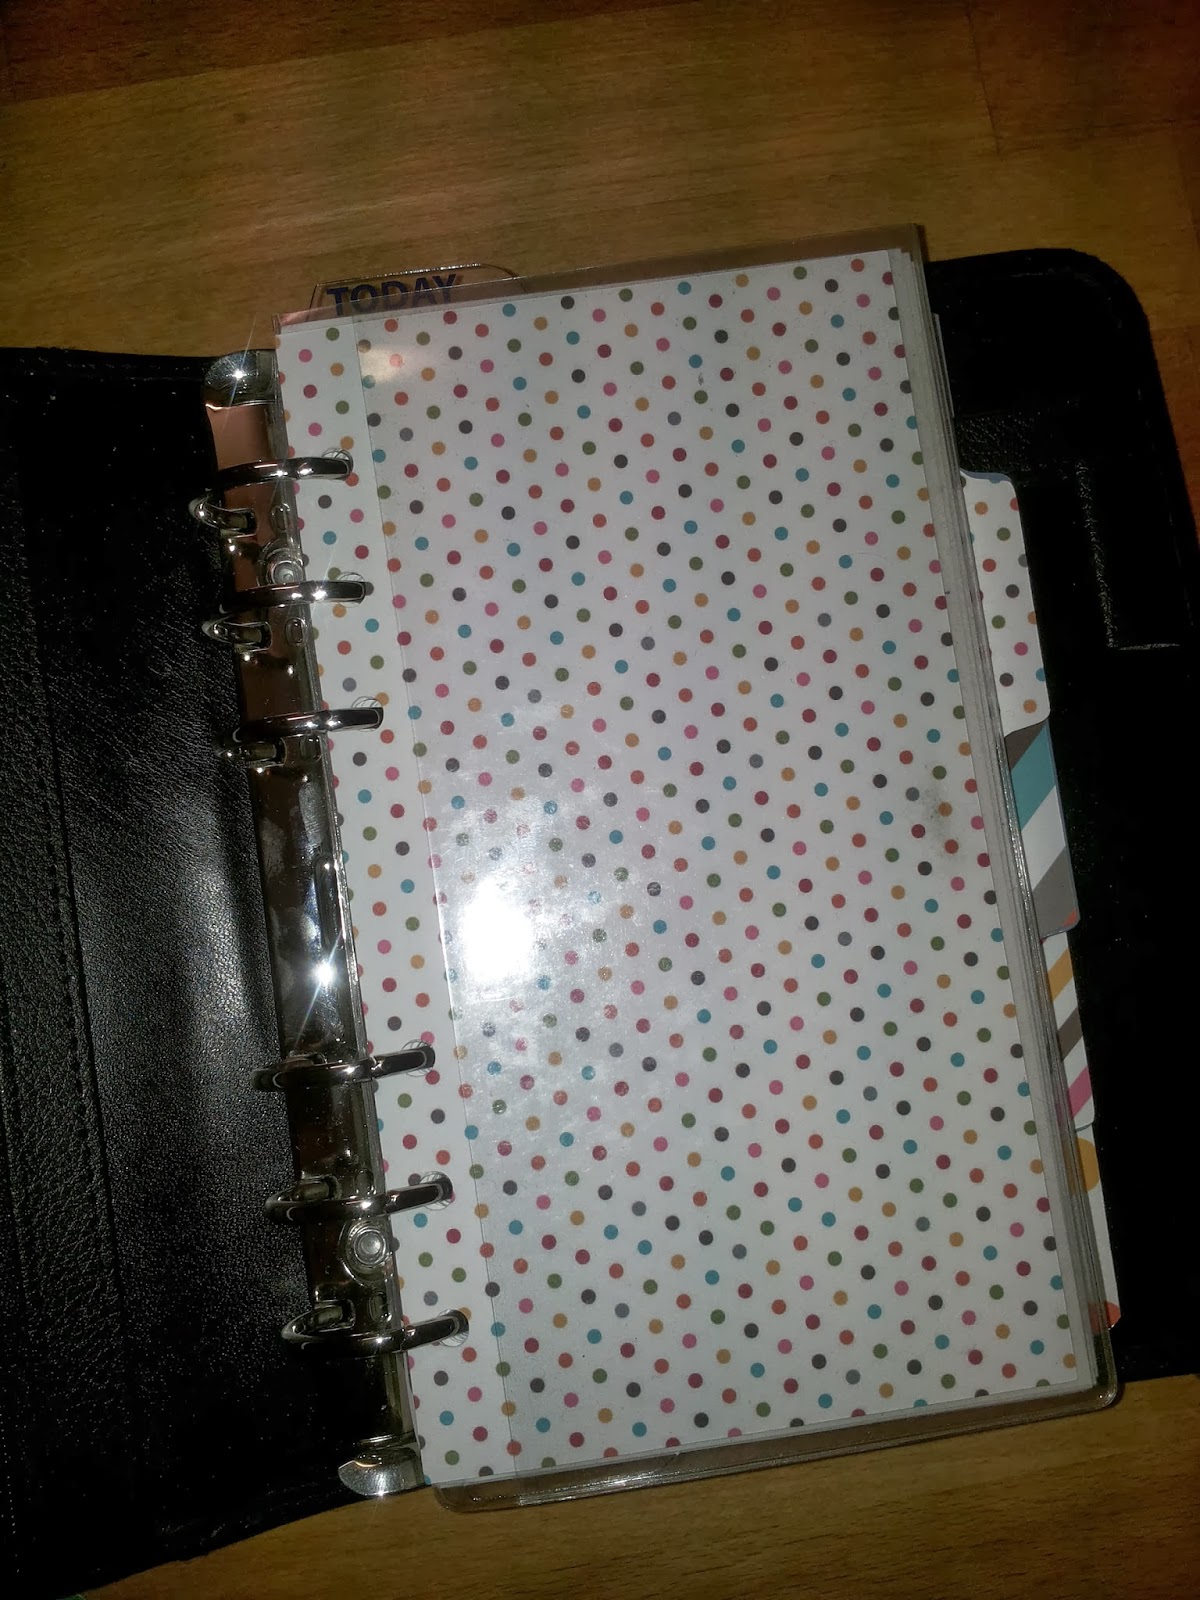
On the Silhouette: Making tabbed dividers for my Collins Personal Organizer


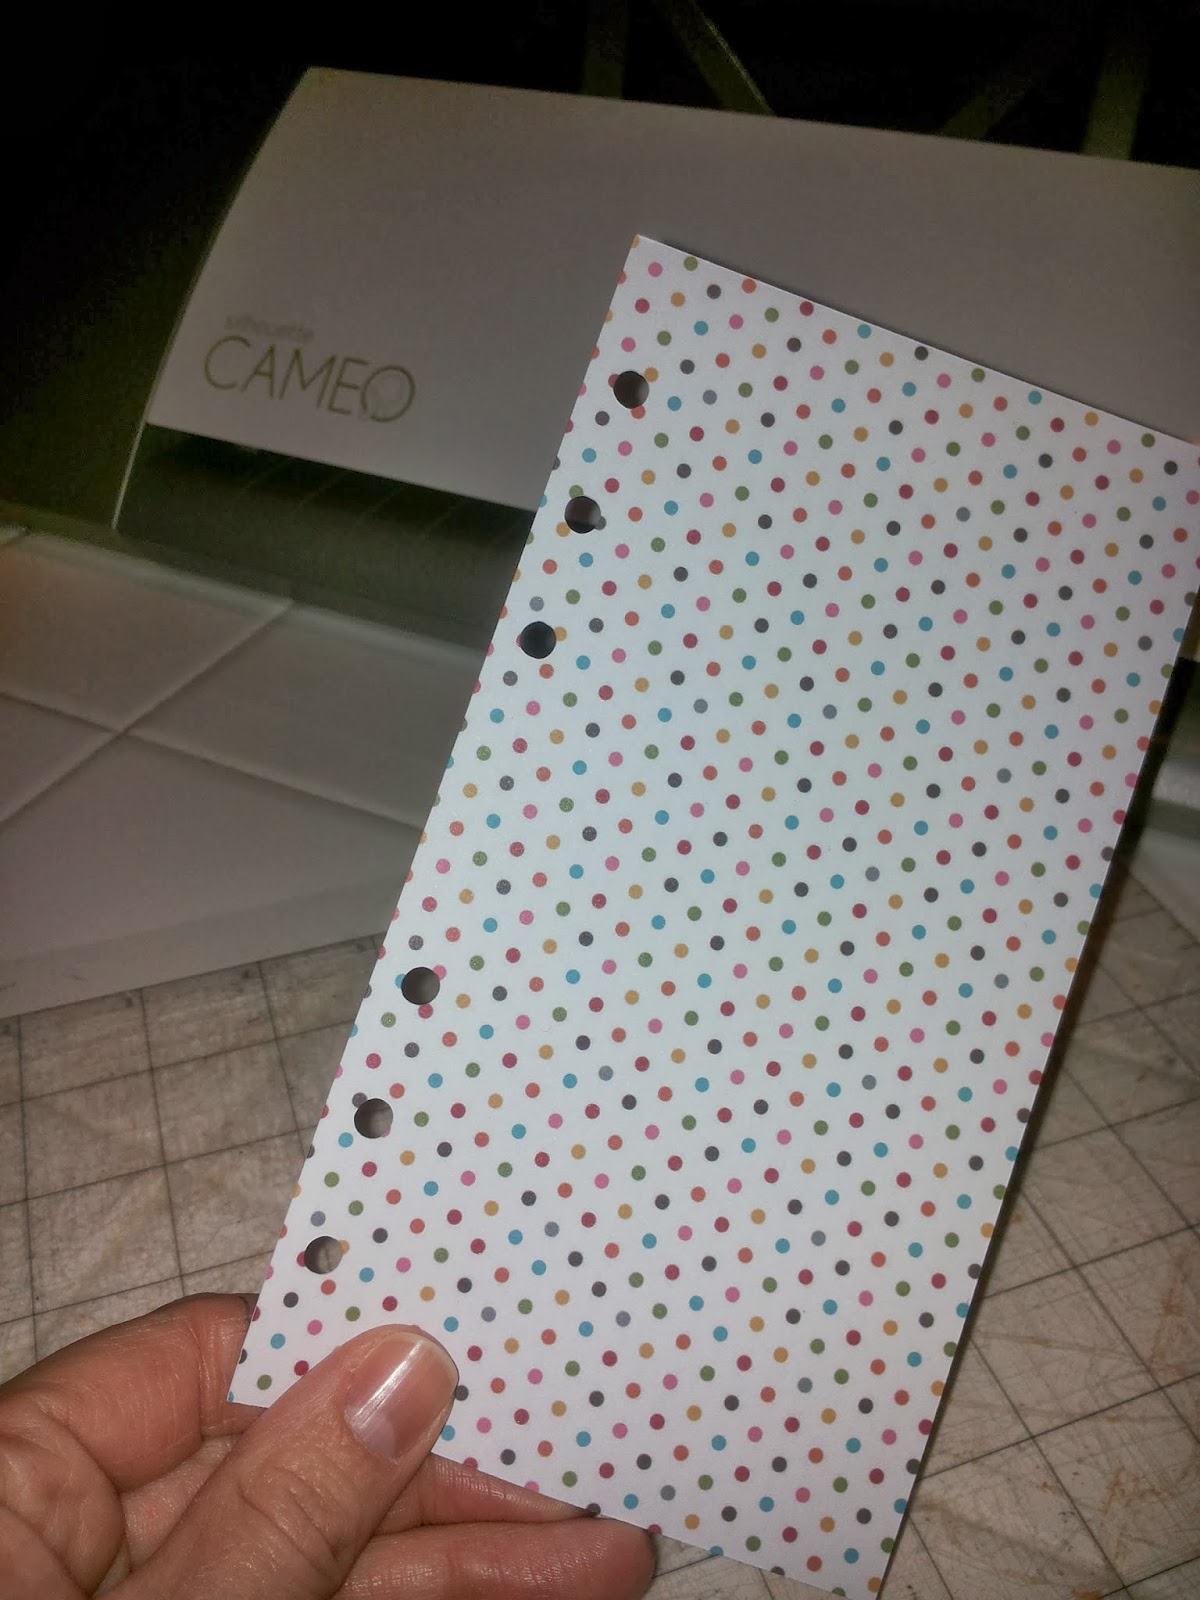
After spending a good few days unsuccesfully looking for cutting files to cut my own dividers for my new Collins Personal Organizer I had a go at making some myself using my beloved Silhouette cutting machine. And it was surprisingly easy:

Scan a coloured (white won't work for this) tab or sheet from the planner. Be careful about how you place your original so that your holes (or tabs) will end up on the right side when you cut later on:

Open scanned doc. Make sure you have it set for opening .jpeg, not Silhouette files or else they won't show up. Move the scanned shape slightly away from the edge, it will be easier to work with later.


Click on the 'Open Trace window' blue and yellow button in upper right corner. And then, in the right hand menu, click on 'Select trace area' at the top. Draw a box around the shape.


Now the important bit: go to trace settings and unclick 'High Pass Filter', click 'Low Pass Filter' and then start moving the 'Threshold' slider up till your entire shape is a solid yellow. For me that was around '88' but it will differ depending on the colour of your original scan. Don't go all the way to 100% or you'll loose the punch holes.


Now press 'Trace' at the top and a red outline will appear:


You can now remove the original scanned image from the red cut lines. And then before doing anything you SAVE your file as a Silhouette file so you can re-use this as often as you like. 


Time for cutting!

Click 'Send to Silhouette' button at the main menu bar and follow cutting instructions. Happy cutting!


Let me know how you get on!

woensdag 11 december 2013

December Daily....eeh how about weekly?

Until last year I had never heard of December Daily (or DD...like there aren't about a dozen things that could mean ?). But when I did find out I was very intrigued. Was this something I could and wanted to do?

I loved seeing the christmas themed albums and all those great pictures of typical (American) Christmas scenes: trees, pj's, hot cocao and Starbucks red cup:-) But it also seemed like a lot of work and I didn't really like the idea of making a separate booklet for that one month of the year. I kind of like my months to stick together if you know what I mean:-)

But then there is the great sense of community you get from joining hundreds (if not thousands) of scrapbookers who do do DD. What to do? I thought I would just watch what others did and not do anything myself. Well that didn't really work for more than a day or so:-)

I soon got it into my head that I could do one picture a day and maybe all those 31 individual pictures could just go into one huge double spread. So I asked for some tips on the Holiday Storyteller FB page. And they had loads of templates to use. This got me thinking that I may have something in my digi-stash already that I could use. And that's when my month-across-two-pages plan turned into my one-week-a-page plan and that's what I'm going with:-)

Week one is done. It is all in Dutch, sorry...but it is all about a very Dutch tradition of St Nicolas. Like Santa he brings presents for the children, only he arrives halfway through November by steam boat from Spain and his main drop-off is December 5th. After that it's full speed for Christmas: getting a tree and decorating!
I used a template by Penny Springman, background papers by LLIELLA Designs and Basic Studio (kraft).The row of houses and arrow are by MO&Mo Studio, a Dutch design studio that does special St. Nicolas papers and embellishments.

Are you doing December Daily or some Sinterklaas or Christmas themed layouts? Let me know, I'd love to see them.

donderdag 21 november 2013

Wrapping it up: Making your own wrapping paper


I have been buying Christmas (and Sinterklaas, a Dutch tradition) presents over the last few days and really felt like doing some wrapping. I have been using, and loving, plain old kraft packing paper to wrap up presents. Pimping them with colourful ribbon and tags. Occasionally I had also stamped on the kraft paper with kids alphabet stamps. I'd personalize the paper by stamping the birthday boy or girl's name all over it, quite a hit I can tell you;-)

So today I wanted to try something a bit more sophisticated for a grown up Christmas present. I decided to stamp a pattern of two different Christmas stamps in bright white ink. I really love how the bright white contrasts against the brown kraft paper.


Here's how I did it:

You need: Kraft packing paper (post office or office supply store), stamps and good opaque white stamping ink.

  1. Spread out the paper
  2. Pick out a stamp
  3. Ink up the stamp really, really well. It really pays off to ink the stamp (and not push the stamp onto the ink).
  4. Stamp away, generously re-inking after every print you make. I did mine in relatively straight and evenly spaced lines as it seemed to fit with the clean images I was stamping but of course you can do it any way you like. I would recommend you keep the pattern quite tight so you can see it well ones you have actually wrapped something with it. 
  5. Leave it to dry for a while as the paper is quite glossy and not so porous. I ended up using a heat gun to help it along a bit.
  6. If you like your images to really pop out (and have lots of time) you can choose to emboss them with white embossing ink. It will look great. I made a few tags and embossed those and you can really see the difference. 
  7. Wrap up your goodies....

woensdag 20 november 2013

Making the most of every scrap: Quick Kids Cards and my first shaker card:-)


Boy, it's been a while since I did some proper crafting but today was the day and it felt great! I've been meaning to have a go at two things for a while:
  1. Using my son's foam letters to make kids birthday cards and
  2. Making some sort of shaker card.
And today was the day:-)

I really like making cards for kids but I approach them a little different than I would a card for an adult. I try to keep them simple, fun and attractive. And if at all possible made of basic inexpensive materials that could possibly inspire them to make something similar themselves and wouldn't make their parents feel too guilty about tossing them either;-)

The cards you can see above fit al those criteria really well. They're birthday cards for three girls aged between 4 and 6, the age in which, in The Netherlands, reading, writing and learning your ABC's is a big part of your life so hence the use of these glittery letters. These came from a big jar of glittery letters I bought for my son but he is never interested in them so they now finally have a good use:-) The squares were all punched out of scrap card- and scrapbooking paper and I used a stamp for the sentiment*. I made these three cards in about an hour and a half (including punching out about 40 or so squares to be used on future projects).

I then still needed a card for a 2 yo boy and I really wanted to make something that would be appealing to him. Now boys really like touching and trying things not just look at something 'pretty' LOL so I had a go at making a shaker card. It was my first ever and I am quite pleased with how it turned out:


The background is made of paper scraps again and I really LOVE it. I used an old overhead projector sheet (same as I used for my Silhouette Stencils) as the window and glued it to the paper frame with superglue just to make sure it couldn't come undone and all the contents spilling out. I filled up the space in between with assorted sequins, the turtle and octopus are glued to the background. I then used double sided tape to attach top and bottom. I only had really thin tape which means there is not a lot of space between window and background so it doesn't shakes very vigorously but it is still interesting for little curious boy I'd think. But I am really going to look for some thicker double sided tape to  create a bit more air. But all in all I am very happy with my first attempt.


* Fijne Verjaardag = Happy Birthday 
Ik vind je Lief = I think your sweet 


maandag 30 september 2013

Stencil cutting on my Silhouette


A few weeks ago I watched Julie Fei-Fan Balzer's free online stencil class and got really inspired to do some Art Journalling with stencils. But stencils are not so easy to come by in The Netherlands and even if you can get them they are pretty pricey. So I wondered if I could make my own. I had seen Lain Ehmann of Layoutaday.com use left over paper die cuts from her Silhouette for stencilling and that gave me the idea to try making some stencils myself using my Silhouette. I wanted them to be a bit longer lasting than paper though so I used some old OHP (Overhead Projector, remember those?) sheets I had lying around. And it worked a treat! 

When I posted these on Facebook Lain asked if I would write up a tutorial to put on her blog to which I gladly obliged and here it is:


A card I made using my number and music notes stencil. I love using the Tim Holtz Distress inks with the stencils to get that lovely graded effect that really matches the tone-on-tone of the 20 euro note I worked into my brother's birthday card.


maandag 2 september 2013

Do it now! A bed for Eeyore

This morning my 4 yo son insisted on bringing his stuffed Eeyore with us to school. We got him dressed and took him on the bike with us. But as much as everyone liked him he couldn't stay in school so he came back on the bike with me.


When I arrived home with Eeyore on my arm I decided to get the doll bed out of the basement. I had bought it two years ago but my little man had little interest for dolls back then. But things have changed now that he is in kindergarten. There is a lot of 'playing mommy and daddy, cooking, cleaning and now, caring going on. I LOVE it! 

So when I got the bed upstairs I got the urge to make some bedding for it. I first wanted to postpone it until 'I had time to spare' but I figured it would never happen. You see, I am a little scared of my sewing machine (I get big knots of thread so often!!!) But something inside me said: 'Do it now!' and I just got on with it. I used an old curtain in a nice colour, an old piece of changing matt (for the mattress) and some stuffing (for the pillow and duvet). 

I ironed everything, pinned only the mattress cover together and then just sewed it all together leaving a little opening to put the stuffing in. The Mattress cover has a cool opening thanks to my clever use of the original hemming on the curtain, in case Eeyore wets his bed you know:-)

So how is that for an hour of work...


vrijdag 31 mei 2013

LOAD Day 31: Oh no, it's finished!

Yesterday I was so happy that the end was in sight but today I am feeling very sad to realize that this challenge is over. I have really enjoyed getting a little kick under the behind each day to create another page of memories and I am always happy with the layout that I have done. I will now have to do my own butt-kicking again:-)

Today's prompt was a room on the Clue board and it was the billiart or pool room. I went with the POOL and scrapped this week's first proper trip to the little pool because the weather was finally warm and sunny!


This layout will be going to my parents to put on their calendar. I give my parents, mother-in-law and ourselves an 'empty' calendar eacht Christmas and then send out layouts each month to put on it. This is the 3rd year running and it's become a pretty nice memory file.

Today was also the first time I scrapped while listening to some of Lain Ehmann's podcasts and it was really cool to have creative scrapbooking talk going on in the background. Check it out here if you'd like some soothing scrapbook talk:-)

donderdag 30 mei 2013

LOAD Day 30: Yummy layout with bonus recipe!


Today's prompt was the lead pipe which Lain suggested to interpret as a rolling pin so I went with that and decided to scrap what has become 'my' (it's actually Tesco's) success recipe for scones. I found this recipe in a free supermarket magazine and made them in our holiday cottage. They turned out great and I have been making them regularly since, always coming out perfect:-)

Now the original recipe is starting to look a bit battered so I thougth it might be nice to document it in a layout. If you'd like to get this recipe to just leave me a message with your e-mail and I'll be happy to send it to you.

woensdag 29 mei 2013

LOAD Day 25-29

I do my best but I cannot seem to do a layout a day, look after my son and house and still keep this blog up to date so I am doing another batch post:-)

Happy as I am with my stack of produced layouts I am really reaching the point of where I am getting a bit fed up with doing a layout each day and not having much time for anything else. But I am finishing this month because there are some really important realizations. I am starting to get a feel for what is really important and what is doable in the scrapbooking departement of my life. I love scrapbooking but I love spending time with family and friends more. And even when I am scrapping a layout everyday I do not feel like I am making much headway with all the years of pictures I still want to scrap. And these two realizations mean that I have to rethink my scrapping strategy. I do still want to have photo-albums to leave through and I'd love them to be 'pretty'. But I do not have time to scrap every nice picture so I have to be more selective. Next to that I really enjoy getting my artsty side out for the occasional 'WOW' layout with cool techniques and lots of embelishments. So I think I will have to come up with a simpler plan for documenting my and my family's life. More on that later. If you have ideas feel free to share.

For now let's show the layouts of the last 5 days:

Day 25: The prompt was about self-defense and for me to protect myself from going too crazy I need to spend time outside in nature. And I believe we need to be protecting nature, I do my best to pass this on to Thomas as well. My last digi layout so far. It was the day of my birthday party and there was family around pretty much all day plus cleaning and cake baking so a quicky spread in between guests  but I love the colours.


Day 26: Prompt was about the movie Psycho about a scary hotel (as I've been told because I never saw it) so I scrapped about our stay in a deserted hotel in Sweden. I thought I had booked a room in the lovely mansion in the top picture but instead we were the only people staying in the 'baracks' at the back. By 9PM all the staff had gone as well and it was a bit freaky reminding me of 'The Shining'.


Day 27:  Oh no, no prompt today! The link didn't work and nor did the link on the Master Page. I wasn't too fussed actually as I had already decided to go off-prompt today to create a quick layout for my Mother in Law. Each Christmas I give her, my parents and ourselves an empty calendar and I send them a layout for the calendar each month. So this was one much like the one I did in week one, about Queensday. The crown is embossed with gold embossing powder which looks really good in real life but very dull on the picture:-)


Day 28: Today's prompt was just WHERE? I went with last year's holiday destination: I had requested a beach vacation, thinking mediteranean beaches....I got Northumberland beaches: rainy, windy, freezing water and nobody there. Which my husband thought was the greatest thing about the place:-)


Day 29: Today we are with Professor Plum and I scrapped pictures of the appartment I had bought myself right before I met my husband. I got to decorate it just as I liked and that meant many shades of purple everywhere. Love the really dark bedroom wall!


Well people, two more days to go, so proud of myself for still going strong and thankful for a very patient husband:-)


vrijdag 24 mei 2013

LOAD Day 24: Have a nice day!


Today we were in another room on the Clue Board: The Hall. I went with a picture of the inside of our hallway door. When we moved in back in 2008 this was written onto the door and although we originally had plans to remove it or paint over it...it is still there in 2013!

I have embellished with some handmade rosettes I made today. My husband gave me a scoring board (plus idea book) for my birthday this week and I couldn't wait to use it. But I thought there wouldn't be enough time to play around and do a layout....unless I made them for my layout! 

Really love how they turned out. Thanks to the book Score, Fold and Create! and a great tip from Tool School, a 3-part online workshop on how to get more out of your tools, I was able to make these quickly and they are really sturdy! After sticking the ends together use a big dollop of hot glue to push the rosettes into and they will keep their shape perfectly.


LOAD 19-23 Still going strong!

So it's been a bit manic trying to do a layout, upload it to Flickr, give some LOVE (i.e. positive comments on fellow loadster's pictures), keep this blog updated and sleep (and raise a 3 yo, cook, clean, etc...) so I had to here are the layouts for the last week or so.

Day 19: A is for Alibi became a layout voor mijn lieve vriendin Anouk. In the journalling I described her using the remaining 25 letters of alphabet.


Day 20:  The prompt was suspense which I took more in the anticipation direction and made a digital layout about the anticipation I felt that day because it was my birthday the next day. I love all these 'nights before...Christmas, birthday, New Years etc' I'm really still a little kid:-)


Day 21: The prompt was just 'WHAT?' so I went with this picture of my brother and me back in the seventies playing with.....a casette deck! 'A what?'

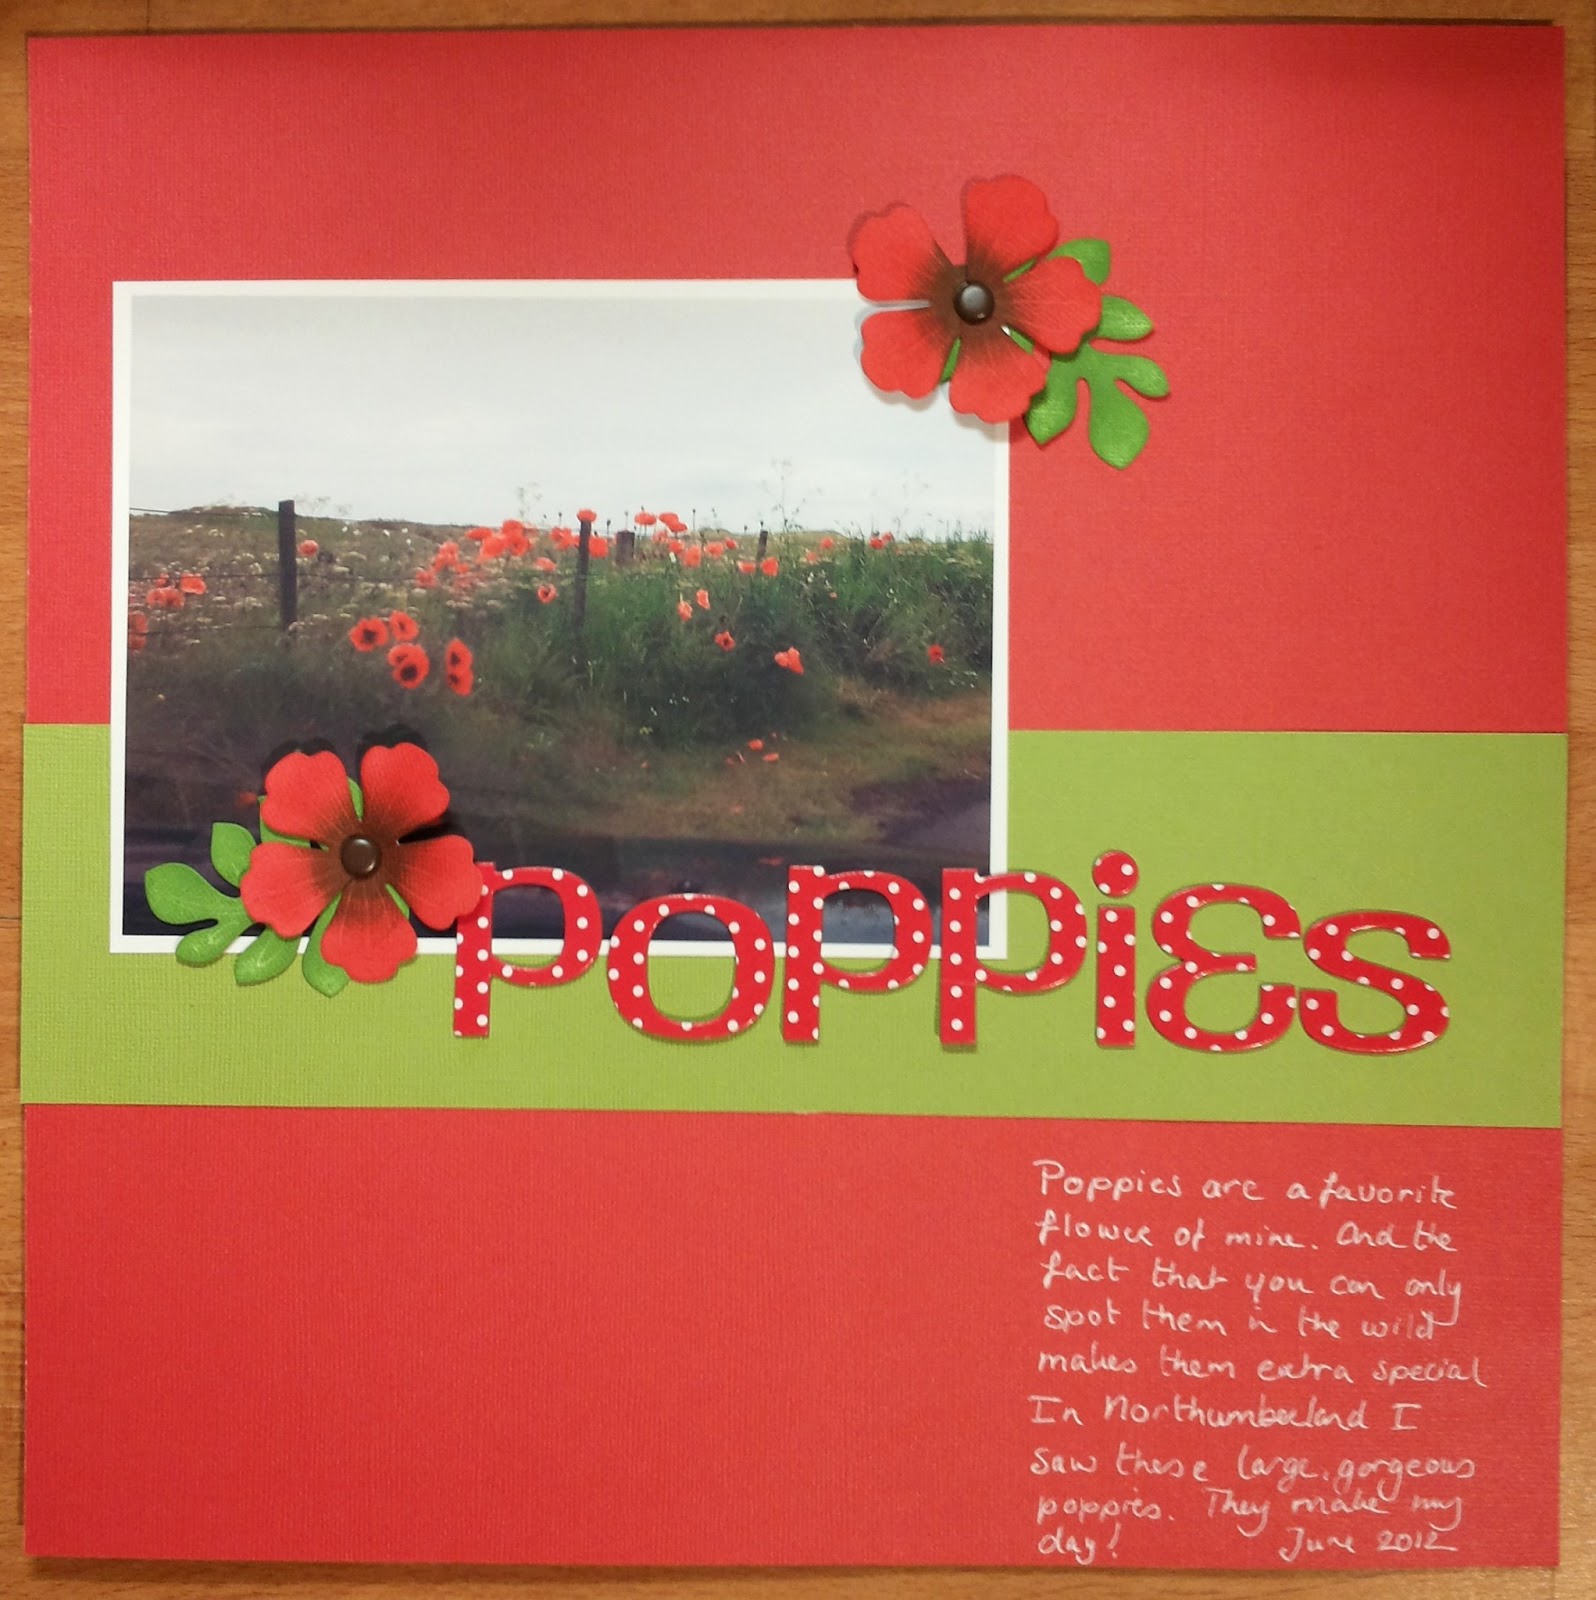
Day 22: Miss Scarlet! Well I took it in the direction of the colour red but really I am not that fond of the colour red. So I started thinking about what red things I do like. One red think I really like are poppies! But I hardly had any good shots of red poppies, I had plenty good shots of fuchsia and soft powdery pink poppies.... So I had to work with this Drive-by shot made on vacation in Northunberland last year. These poppies were huge, bigger than my hand. I made the embellishments from some white die cuts I had received in a swap a while ago. I had a lot of fun personalizing them with inks. 


Day 23: Another digi-layout from our trip to Maastricht this month. The prompt was 'Candlestick' and I went with these shots of all the candles in the basilica of Our Dear Lady in Maastricht. I had so much fun putting the background paper together with all the digistamps and borders. Loved being able to adjust the title to match the colours on my layout. I can do an art journal style without all the mess:-) 


donderdag 16 mei 2013

LOAD Day 16: A brother and his tools and a sister using hers...

The prompt for Day 16 was a wrench, a tool used in plumbing if I'm right;-) It made me think about this picture I had of my brother cutting my bike loose after I had lost the keys to the lock... I had wanted to scrap this picture for a while and this was my chance. I took the prompt to tell about how I call on my brother whenever I need any tool bigger than a hammer or a screw driver. And he pretty much always delivers: huge hammers, tree cutters, brick laying equipment. You name it, he's got it or he can get it somewhere. And...he'll help me use it or do it for me. What a brother!

The other part of this layout is that I have used my tool (heat gun) for the second time since I got it last year. I used it to emboss the  cogs in gold (it doesn't show on this picture but believe me it looks pretty cool:-) and I was really happy about that. 

And to help me use my other tools more often I have just purchased Jennifer Gallagher's Tools School mini workshop (video). Looking forward to checking that out!

woensdag 15 mei 2013

LOAD Day 15: Strutting my stuff: oh yes, that is all gold that glitters!

I am happy, oh so happy! I love this layout for so many reasons: the pictures of my crazy new trousers and gold glittery booties: the black and white journalling card, the glittery title and the glittery embellishments. But most of all I love the background that I made myself with a honeycomb stencil and different colours of distress ink. It matches the pixel shapes on my trousers.

This story is kind of a follow up of my first layout this year about wanting to get my Mojo back. Cool, happy coloured clothing and being crafty and creative are two of the ways I am working on this and it is really working!

LOAD is such an inspirational challenge. I am seeing so many beautiful and original layouts it's difficult not to be affected. One of my favourites is http://www.peonyandparakeet.com/blog/ by Päivi Eerola, she makes the most amazing background papers herself. Expect to see a bit of her in some of my future layouts:-)

dinsdag 14 mei 2013

LOAD Day 14: Who? Karen!

Day 14 of LOAD, I have made it through two whole weeks. I am tired and proud. Today I was back to scrapping with paper and I really enjoyed it. I had totally forgotten about this paper I had found in a discount bin a while ago but with its bit of sparkle it really matched the picture of me and my American friend Karen. We met on exchange in Sweden a long time ago and we were instant friends spending pretty much every day together. When I went back home to The Netherlands and she went back to the US it was heartbreaking but we did our best to see each other when we could. We don't get to see each other nearly as much as we'd like but with a bit of luck we'll be seeing each other again this year.

Today's prompt was just 'WHO?' and I decided to scrap about how much I miss her and how much I am looking forward to seeing her. The picture is from 1997, the story is from the now, love the combination.

maandag 13 mei 2013

LOAD Day 13 - Typically Thomas


I didn't realize that I hadn't put this one up yet. It's my layout for Day 13 when the prompts was 'Modus Operandi' which roughly means 'The way things are done' so, inspired by Melissan Shanhun of http://www.digitalscrapbookinghq.com/blog/ who does Monthly Baby Reports of her second son I decided to do some pictures of typical things that Thomas does at 3,5. I used a standard Photoshop Elements template that I stretched to Scrapbook size. Really happy with this.

LOAD Day 12: Gangnam Style!


Well, this layout almost didn't get done on time. On top of our busy day (leaving our holiday home, including cleaning it and doing a Thomas the Tank Engine day at the Dutch Railway Museum) I got ill yesterday. Part exhaustion, part food poisoning I think. I had started on my layout in the car on the way to the museum and that meant that by the time we got home and I was feeling pretty bad I only had the background and title to do.

The prompt was the movie 'The Usual Suspects'. I had to do a bit of searching before I came up with this. Had I been home where I have all my photos on an external harddrive then it would have been easy but I had to make do with what was on my laptop: 6 months of pictures only:-) So I was browsing through my pictures as we were zooming over the A2 from Maastricht to Utrecht. Finally (I only had limited battery power) I came across these pictures of my son Thomas (l) and his friend Rayan dancing and singing along to the Gangnam Style video on YouTube. With their sun glasses on they look a bit like little gangsters so I thought that would fit the prompt well enough.

I really wanted to add some neon to the pictures as there is also a lot of it in the video. But getting the neon on the different elements wasn't as straightforward as I thought. I am only just getting to know Photoshop Elements so there was a lot of trial and error involved and I am still not sure I did it right but it works for now. This is also the first time I used a black background. I tried many different patterned backgrounds before I came up with the black last night. I think it works really well.


zaterdag 11 mei 2013

LOAD Day 11: Lust for Life!


Wooohooo, I've made it one third into the month: 11 layouts in 11 days. I am very pleased with this result. No guarantees for the future though, tomorrow will be a challenge. We are leaving our vacation address early (some cleaning required) and then we are off to the Thomas the Tank Engine weekend in Utrecht. This should be great fun for Thomas but a bit tiring for mummy and daddy.  We'll be home around dinner time and will have to do some unpacking etc. I am going to attampt to do my layout in the car on the way to Utrecht. I love getting this job out of the way as early in my day as possible. It means I get some proper nights sleep and that is really important if you're trying to raise a young boy;-)

As you can see on the layout our little man (the one in the blue top) loves to rough and tumble! Pictures were taken yesterday while we were visiting friends with their kids on a campsite close to our vacation address. Because I am digiscrapping for this vacation I can just use the pics I take immediately. At any size I like, that's pretty cool. I get so much inspiration from the digi kits as well. I would really like to recreate in 'paper'  that star embellishment with all the bits of ribbon behind it. But for now I went with customizing the original digital embellishment with some alphas (letters) from three different kits by Happy to Create: Awesome Life, Awesome Kid and Action Hero. I really enjoyed trying some more embellishments but all in all it's still a very simple layout, just the way I like it.

Before I forget: Today's prompt was 'Lust' and I went with Lust for Life as these three boys are just having a blast making the most of life. 

vrijdag 10 mei 2013

Load day 10: We're in the Library

With hubby sleeping in and Thomas happily playing with all the toys in our holiday swap home i had time in the morning to do today's layout. So I am free for the rest of the day and evening:-)

Today we are in the Library and I did a layout about a bookshop in a church in Maastricht. We came upon it yesterday and I just had to take a picture and have a browse. It even had a coffee bar in the back, how cool is that?

This is another digital layout. I use bits and pieces from two Happy to Create kits: Awesome Kid and Awesome Life.

The Awesome Life Kit can be downloaded for free at Happy to Create!

donderdag 9 mei 2013

Load Day 9: Water guns and big noises!


Using the really cool Action Hero Digikit by happytocreate.com I created another page about Queensday. With the prompt being about Shooting I thought they would go well with the pictures I took of us with the water guns and making lots of banging noises at the Magic Wand making workshop. I think I will be using this kit again, it suits little boys really well:-)

LOAD Day 8: Canon shots and really fast scrapping


I was wondering if day 8 might be the day I would be skipping because today we were about to go on a long weekend away. And as we were swapping house I spent most of the day washing, cleaning and packing. When all that was done and I had a little bit of time left I decided to check out the prompt and it was Colonel Mustard. Lain suggested, among other things, to scrap an army or navy themed page. And that was all I needed to scrap the fastest page ever, under 30 minutes, including painting the crown gold!

I did the journalling in a Word document and then wondered if I could turn it into our flag by adding blue and red background colouring above and below it. It worked. Printed it out, cut photos to size, paint crown gold and add everything to the orange background paper to reflect our royal family being from the House of Orange.

The pictures are from the morning of our last Queensday. Our Queen Beatrix abdicated that morning and in the afternoon her son Willem Alexander was installed as our new King. It was a day filled with festivities and rituals. One of them being a Dutch navy fregat sailing up the IJ (river like body of water on the edge of Amsterdam) firing off 101 canon shots. All very exciting. Having my son, husband and my best friend with her 3 kids (bottom right) there made it even better.

Now I am not sure what the next few days will bring where LOAD is concerned. We are away with our little family of three and I want to enjoy my time away so I wonder if the scrapping will happen. We'll see.